Less than 24 hours after I Epoxy the strut retaining eye-bolt things in to the wings
Just noticed a little mistake (another one).
I’ve epoxied the little split-pin strut-retaining thingies in quite low down; ie I’ve not got the loop showing much above the surface. I thought that was quite neat, but it’s not going to allow the struts to lie down (for storage) once they’re attached.
Not sure what I’ll do about that yet.
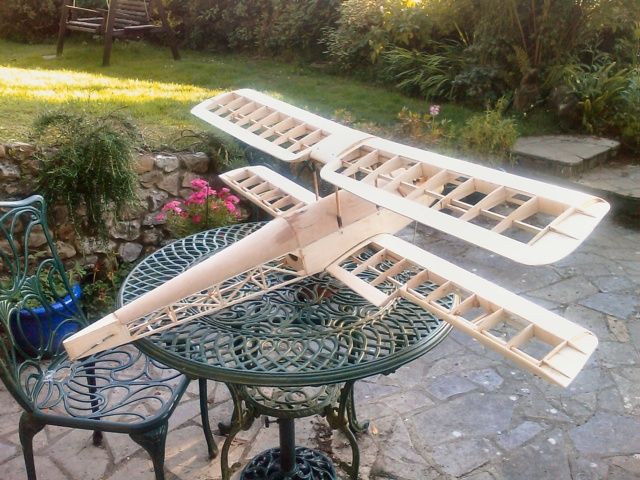
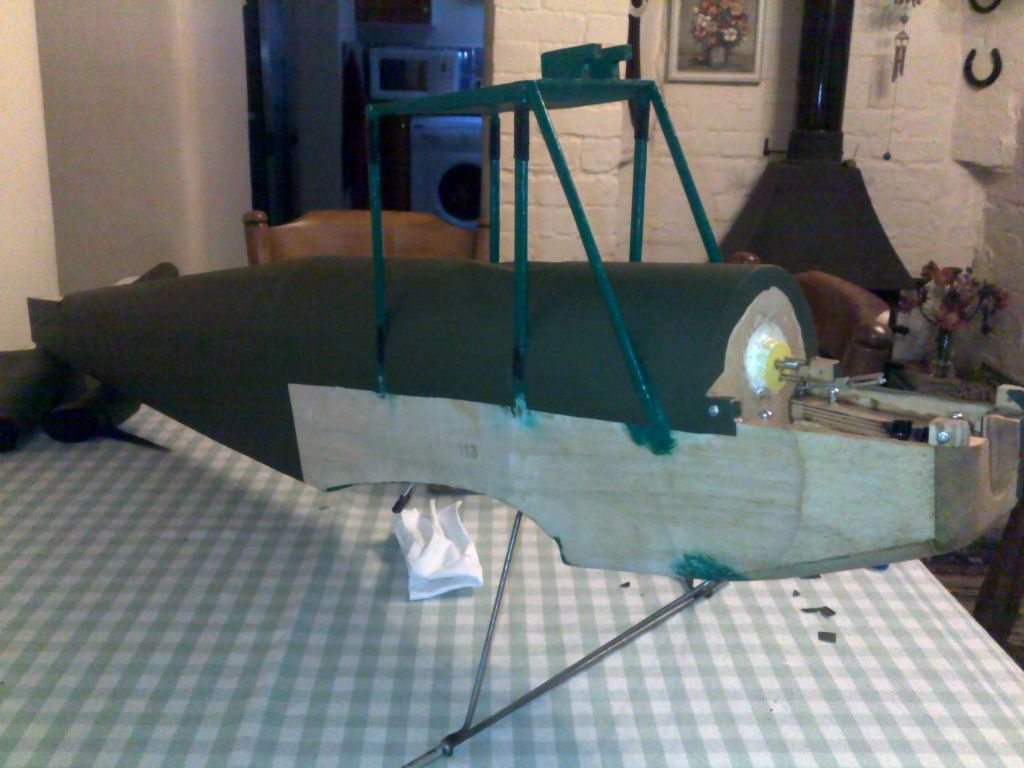
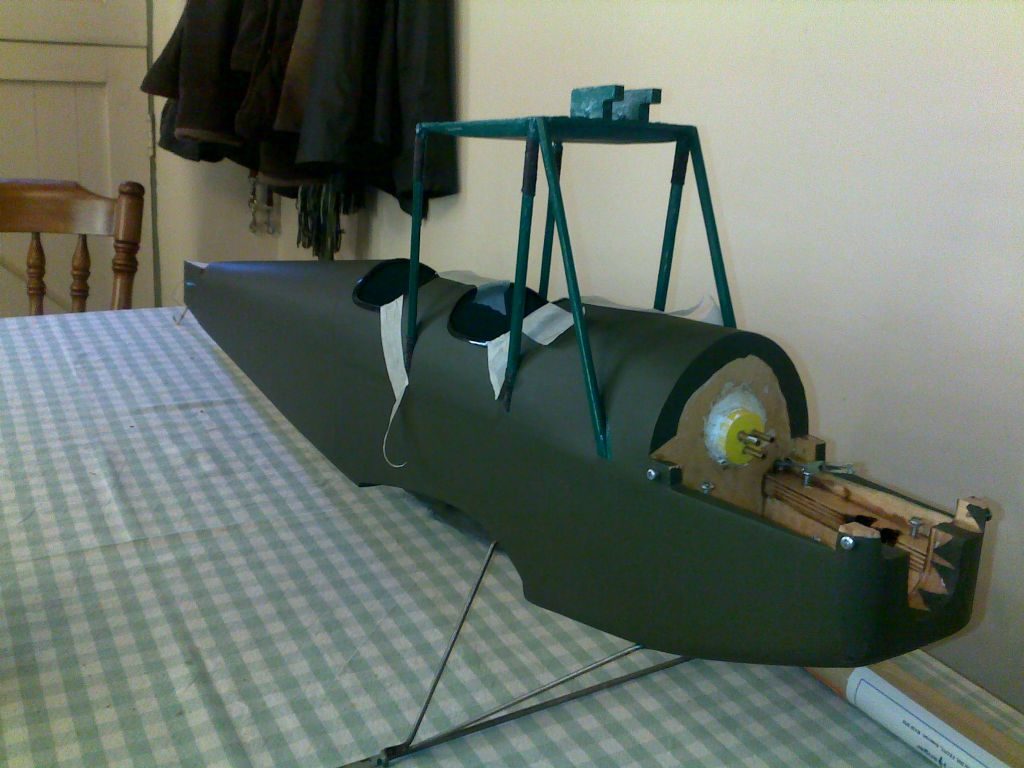
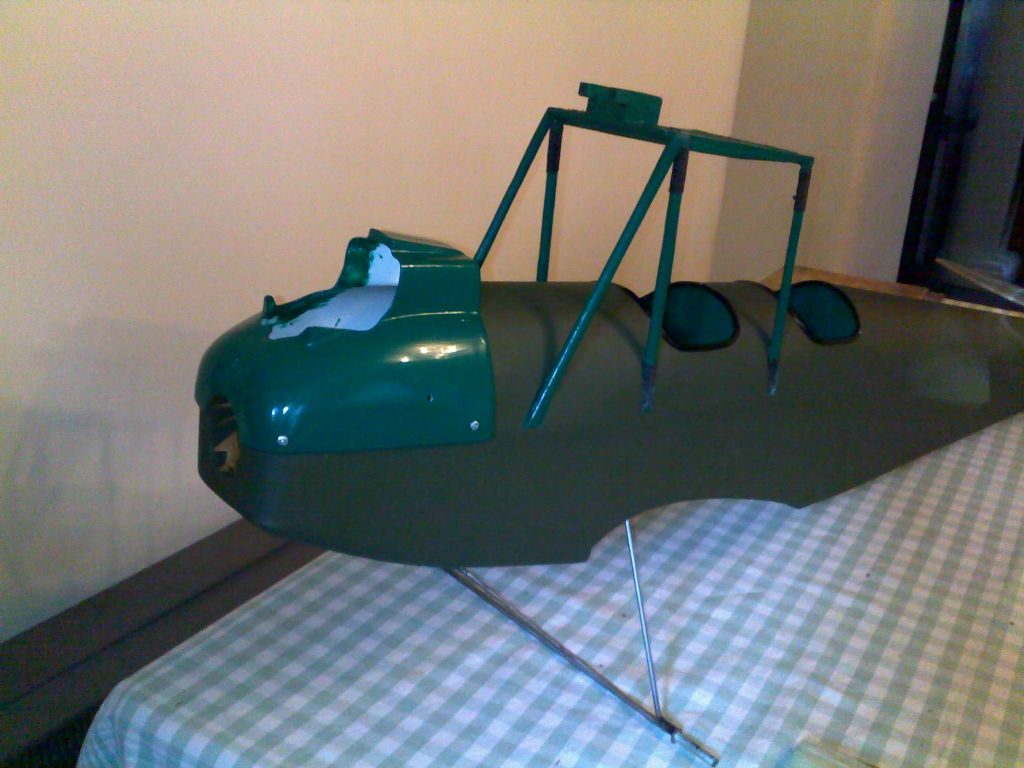
Trial fitting of the ‘beautiful’ new wings to the fuselage.
I managed to get the dihedrals of both wings fairly similar to each other, so that’s good.
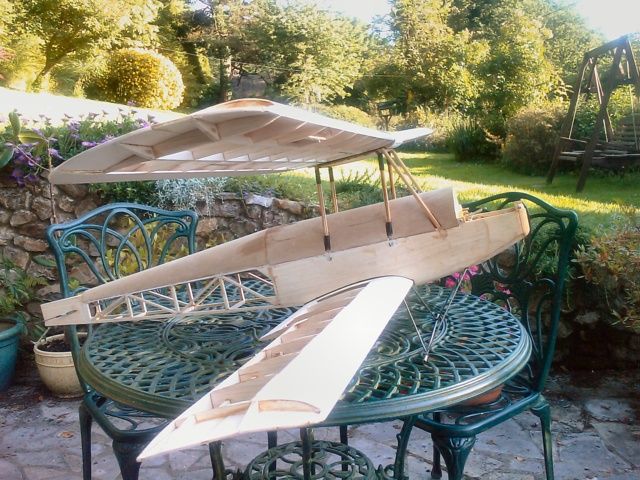
This view shows the dihedral better.
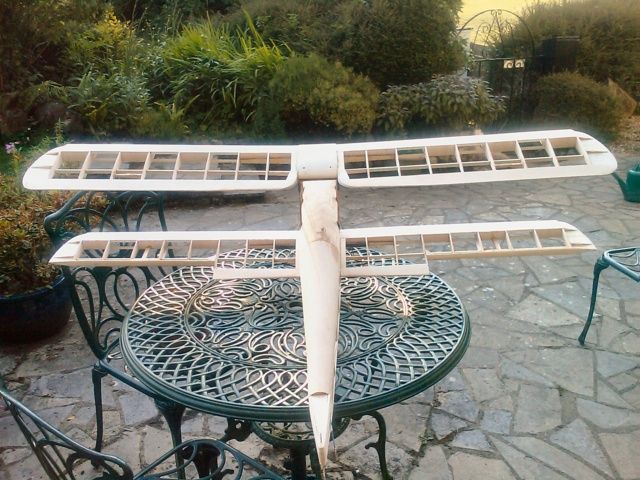
Back view shows that the wings are quite level and even.
Thought I might have problems with this as I built the fuselage/cabane-struts/wing-mounting-holes first. I then thought that building the struts/holes after the wings (like the instructions say) would have been much better for lining things up properly.
I’ve fitted the wing servos, but now have to solder some wire extensions to reach the center of the wings. I’m thinking of fitting one of those little green multiplex connector things. This would be epoxied to the wing center somewhere. I would then only have one connector to assemble before flying. I’ve never used these before. Would people recommend it?
If I do, should I just glue one end, and then plug the other in manually? or should I glue one to the wing and one to the body so they’ll get pushed together when I put the wing on?
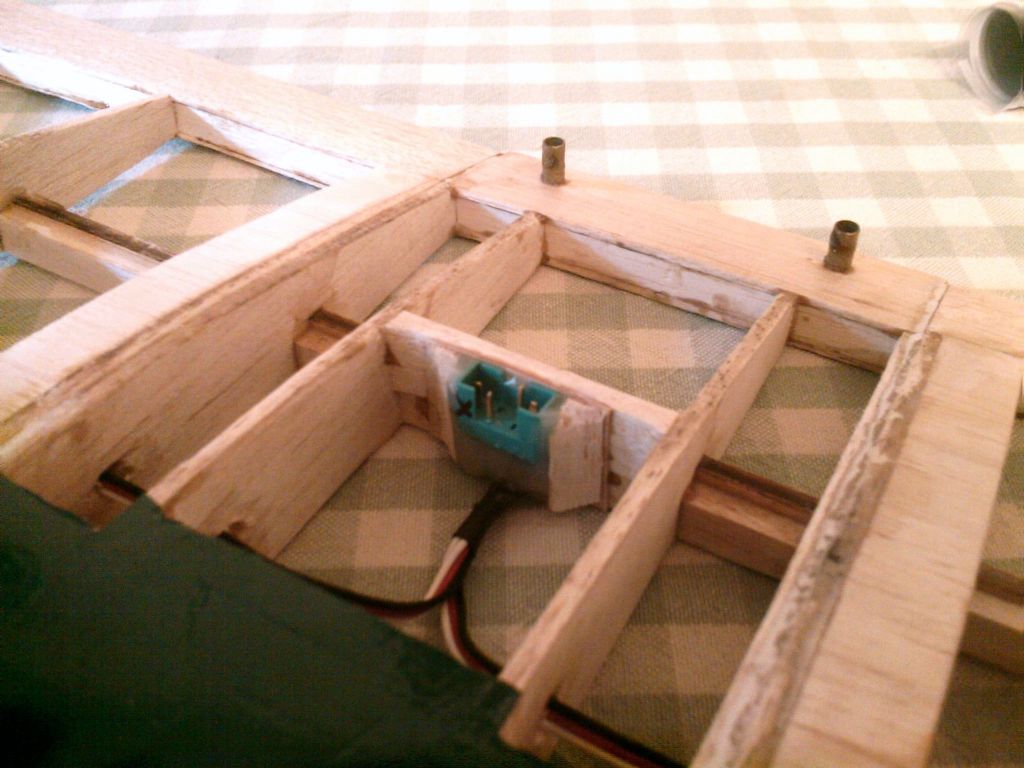
Soldered an extension cable to the servo wires and passed it through to the center section. I’ve soldered it to a green multiplex connector thing, then epoxied this to the center spar. I’ll follow Tony’s advice and leave the other lead, from the r/x, trailling.
Never used one of these before, but should be quite neat when it’s finished.
(I assume epoxy resin acts as a resistor !)
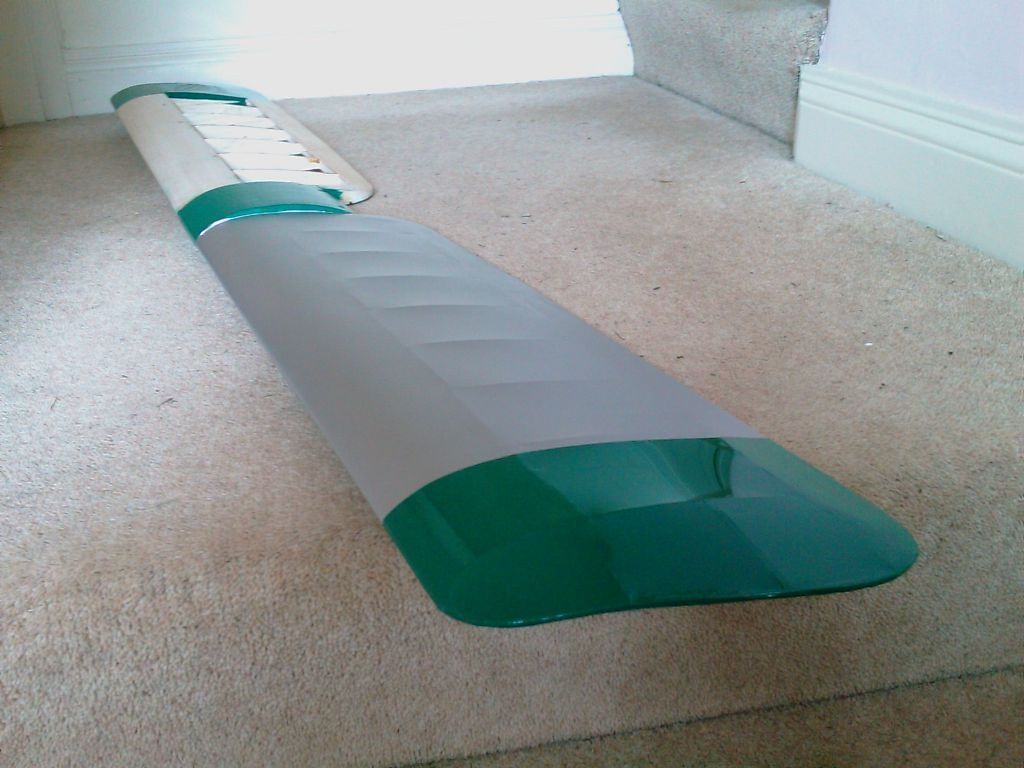
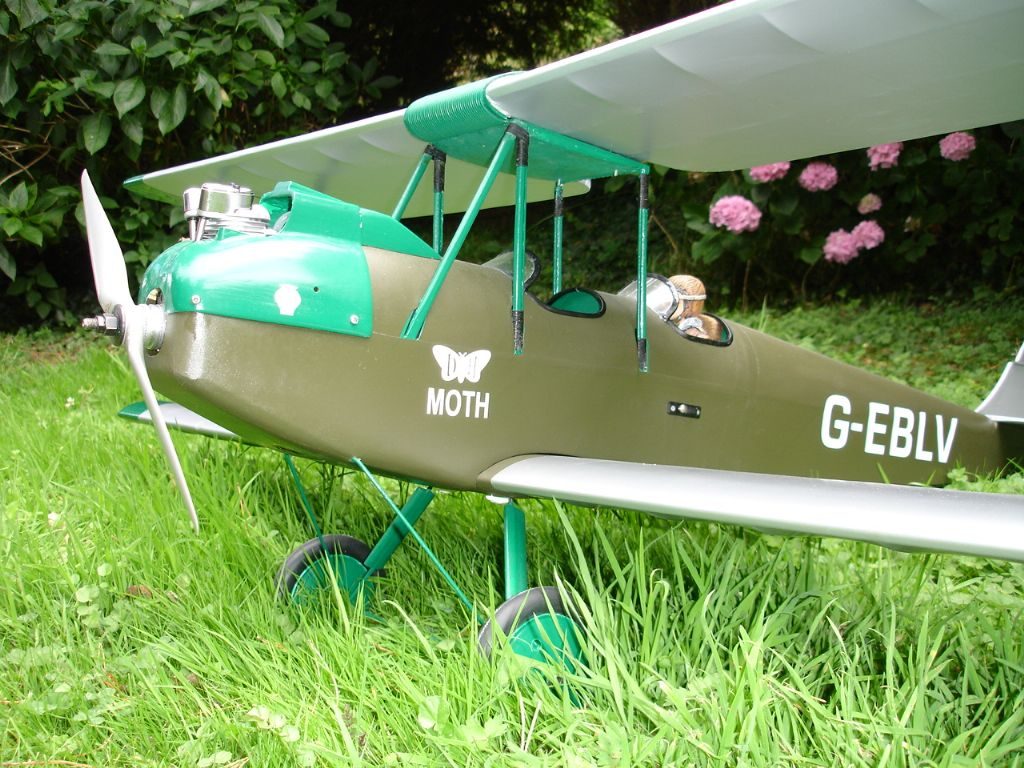
Planning to cover the wings in silver, and the body in dark green.
The sheet of silver covering I’ve got is not quite wide enough to do a whole wing, so I thought I’d do the tips in green.
I’ve read that the ‘proper’ way is to cover the whole tip in one peice, stretched and shruck all the way over. So I’ve done that but couldn’t get rid of all the wrinkles, so it’s not as good as I hoped.
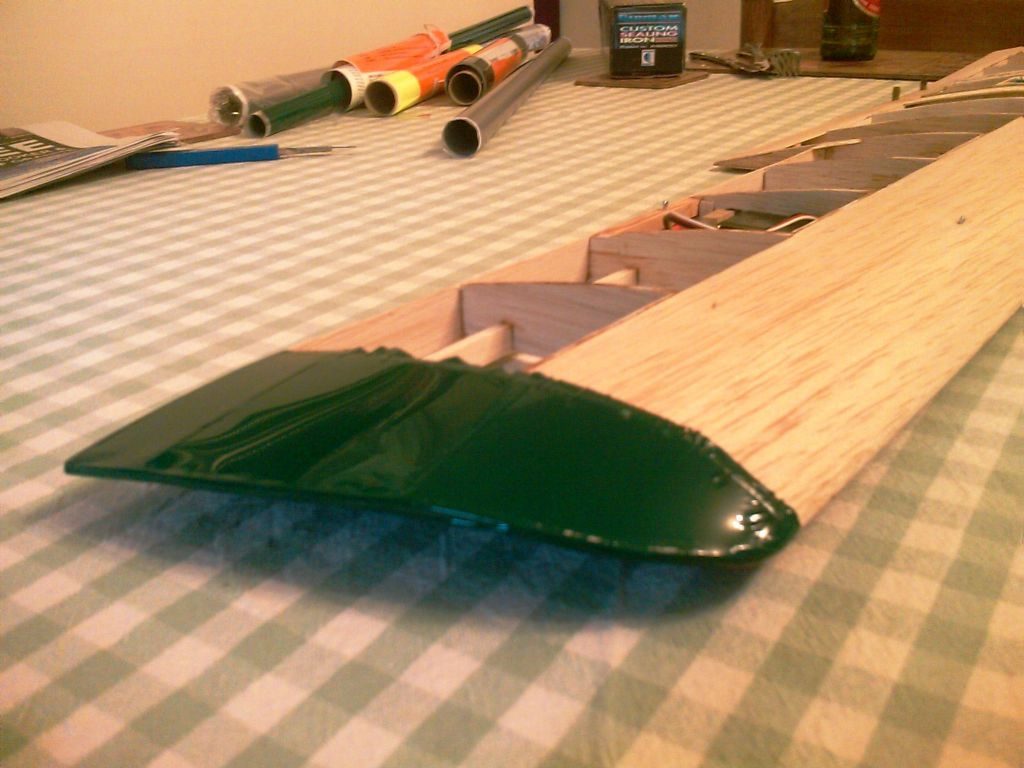
So then on the other wing I tried putting one sheet flat on the bottom, wrapped around the edge about 3/8″, then another shgeet flat on the top, again wrapped about 3/8″ over the edge with the seam underneath.
This has come out better, but I then noticed that I’ve done the first wing tip only back to one rib, and I’ve done the opposite wing tip back to two ribs.
doh
I’ve removed the tip I did in one piece (it was good practice anyway).
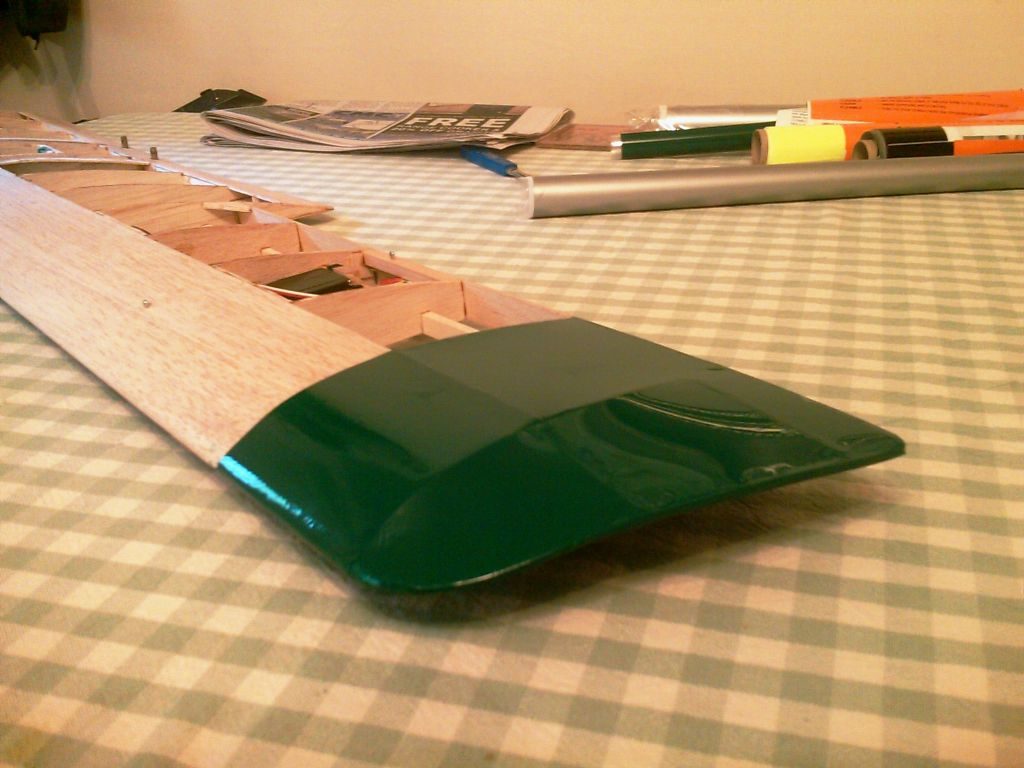
I’ve now covered the two tips in green solarfilm, bottoms then tops, back to the second rib.
Then I’ve covered the whole of the rest of the wing in silver ‘tex, one piece for the bottom, then one for the top. Lots of overlap below the l/e and below the t/e.
Then I’ve covered the center section in green, ‘cos that’s that’s going to match the fuselage.
Took me bloody ages, but looks quite good, even if I do say so myself.
Mind you I do much prefer the look of it in bare wood; now I’ve covered it you can’t see all the work that’s gone in to it.
Maybe it would have looked better covered in cling-film.
Forgot photo, I’ll take one tonight.
Sorry I haven’t posted for a while, so many other things to do.
I’ve now got all four wings covered, and planning the fuselage next.
Found out that I’d made a mistake many, many moons ago gluing the snake in for the elevator; I never thought to match it up with the length of the horn ! Miles out – I’d need a horn about 2.5″ long. So I’ve dug it out, refiitted it, and patched the hole with balsa.
Now I’ve noticed that the horn for the rudder clashes with the horn for the elevator.
I guess this is the sort of thing that experienced builders know is comingl but us novices don’t notice until it’s too late.
Still hoping that Eddie will read this and explain his ‘magnetic struts’. I can’t see yet how I’m going to attach them.

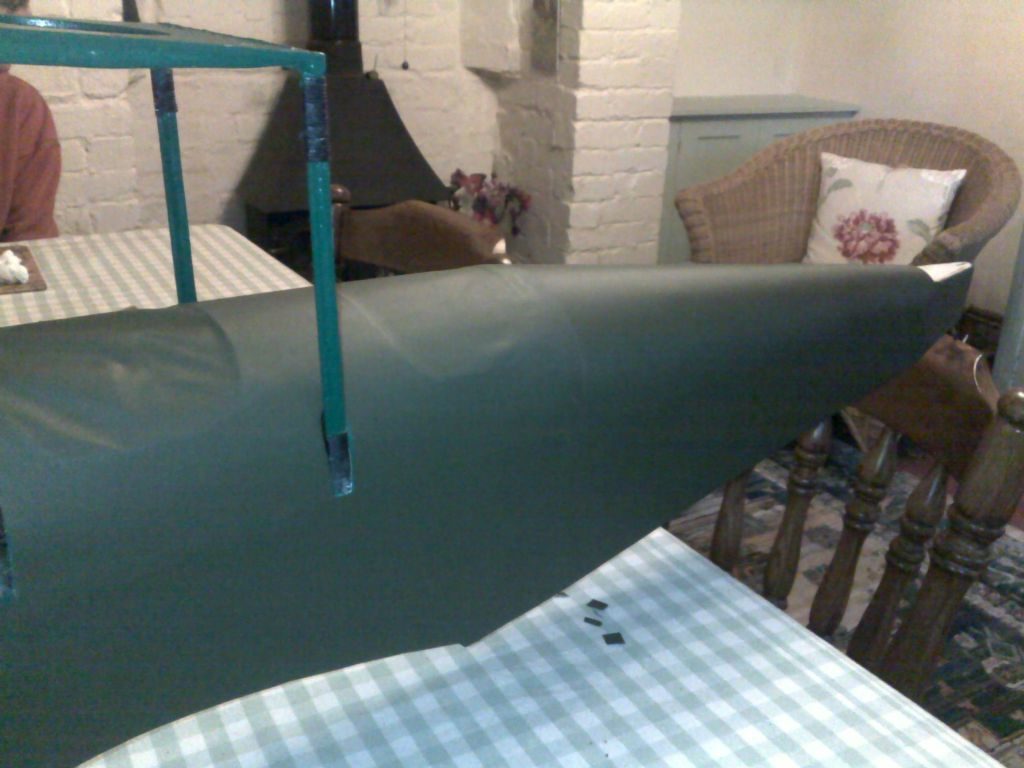
Finally getting round to covering the fuselage.
I’ve added a few extra balsa strips underneath, ‘cos I’ve already broken a couple picking the plane up.
Would suggest you beware of using Solarfilm/Tex until you’ve got the colours sorted.
I bought their ‘Dark Green’ solarfilm for the wing-tips, and their ‘Dark Green’ solarlac (sp?) paint for the cowl and cabane struts, then ordered their ‘Dark Green’ solartex for the fuselage and it’s completely diferent, much more like a very dark Olive-Drab.
They haven’t bothered to reply to my emails so I’ll just have to be wary of using their products in the future.
Difficult going round the cabane struts.
I’ve used one large piece for the rear fuselage top and sides.
One for the front top.
One for each front side.
One for the rear bottom.
And one for the front bottom.
Two main secrets to good covering;-
1. remember to take the backing film off.
2. take your time.
Very pleased with the finish of the covering film.
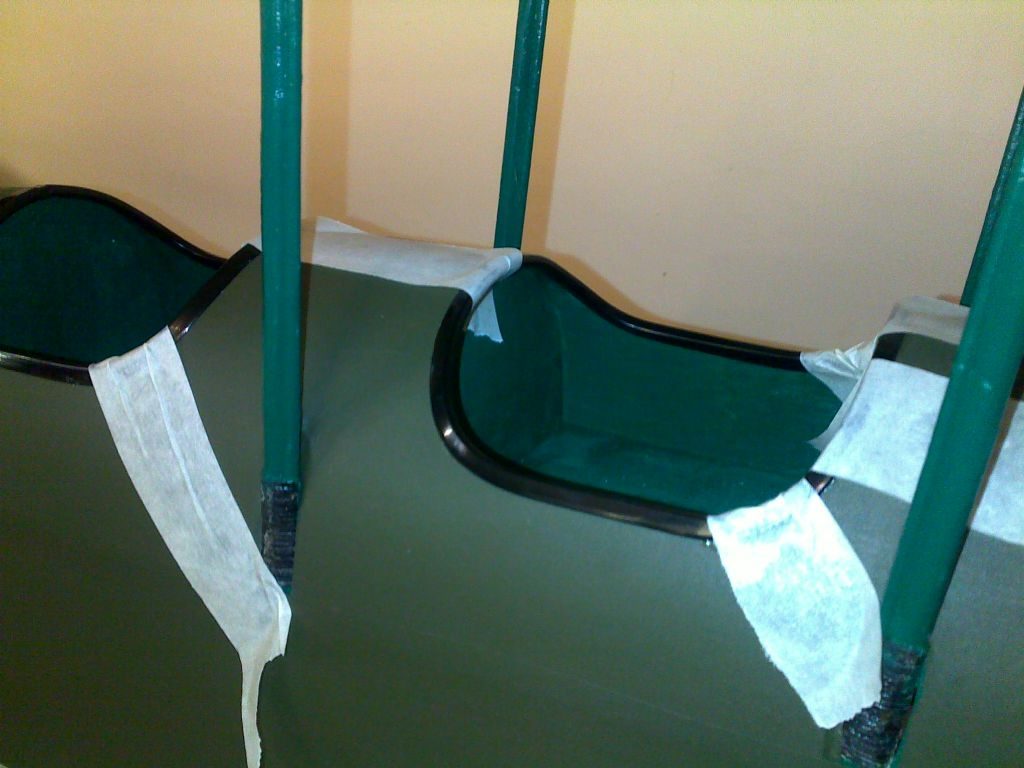
Now adding some coaming around the two cockpits.
Not bad at all, even if I do say so myself.
Took me bloody ages, but not a single wrinkle.
(the masking tape’s just holding the coaming in place).
Tip No. 3 for film covering.
Use a little masking tape in the corners, to hold the film in place.
Then simply iron through the masking tape, and take it off later.
Wish I’d discovered this before I started doing the wings.
Thes colours are ‘totally’ different.
All labeled as ‘Dark Green’.
I like using the Solartex stuff, but will hesitate in future until I get the colours right.
Anyway I’ve decide that it’s not going to be an exact replica model, so the colours don’t matter that much. Even thought of doing it in modern ‘wacky’ colours like some of the new ‘3D’ planes.
You can see the colour difference between the cowl and the rest of the fuselage. The fus doesn’t look as green as in the photos; looks more brown.
Might paint the front-bottom of the fuselage and pretend I meant it to look like that.
Very pleased with the finish though.
Wing struts next: as I mentioned earlier, I’ve put the supplied split-pins too far into the wing, so only a tiny bit of the loop sticks out, I’m not sure how I’m going to attach the struts.
Could be a serous problem, that’s why I’ve ignored it for the last few months.
And now another question.
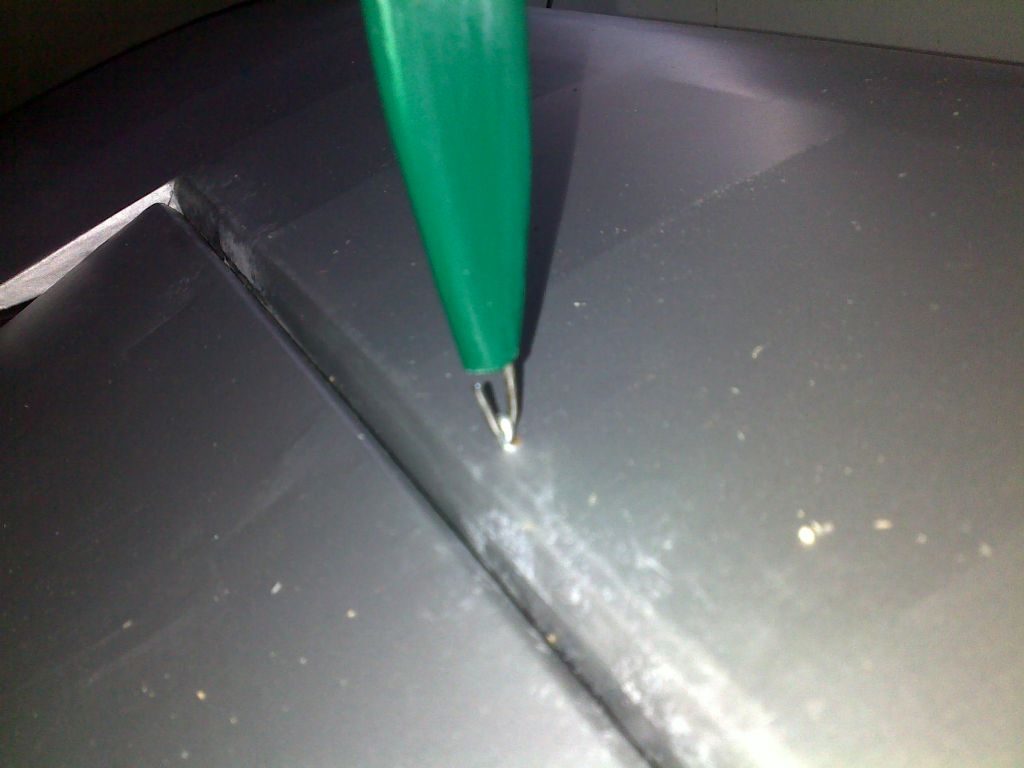
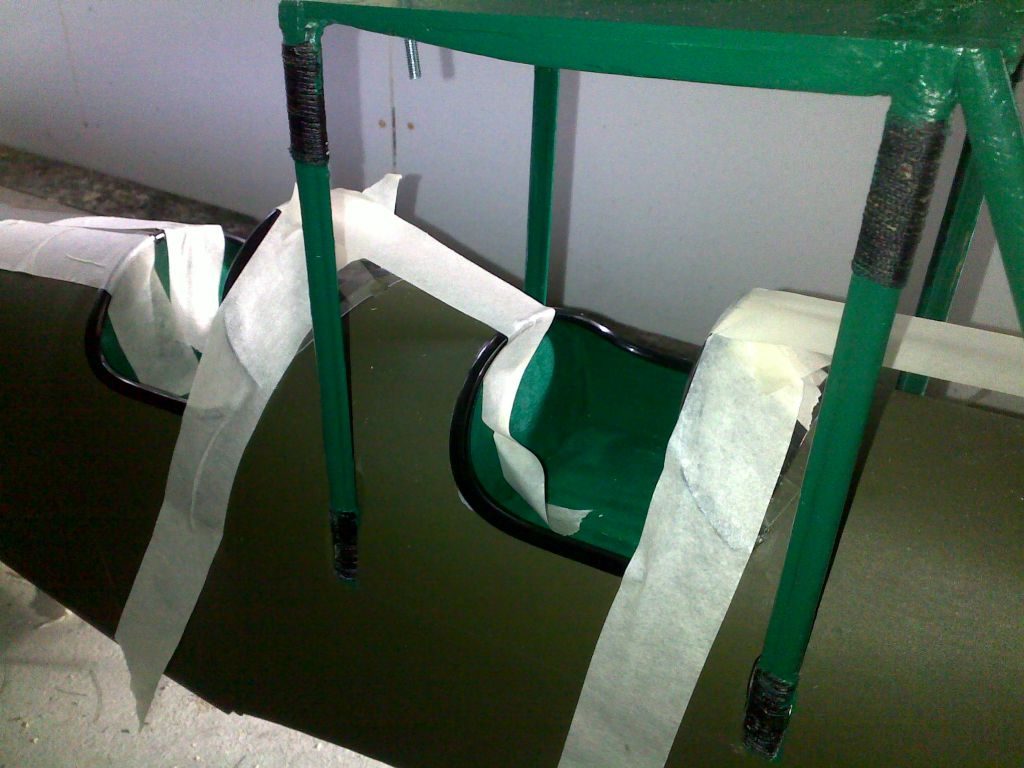
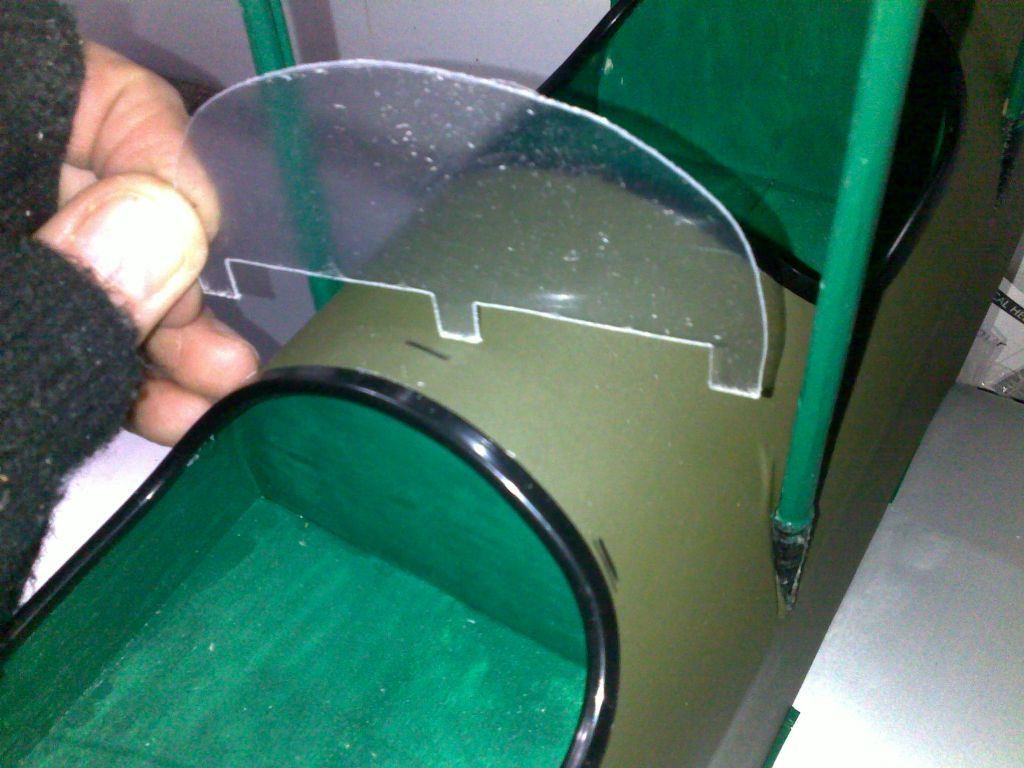
The wind-screens supplied with the kit have three little tabs.
Am I supposed to cut slots in the fuselage and glue the slots in?
Or maybe they just fold flat and glue on?
Or something completely different?
As usual the instructions don’t give any clues.
I’d already started marking out the three slots (see the photo), but thought I should ask before putting knife to wood, as it were.
As I’ve said earlier the instructions are perfectly fine if you’ve done this sort of thing before; or if you’re confident enough to just have a go or want to do things your own way. They’re not at all detailed for a complete beginner, but then it’s not a total beginner’s kit, is it?
I probably fall in the middle camp. – never done this before so coming up aginst new challenges, but happy to go and try things once I’ve figured out a way forward.
As an example I’ve put in two aileron servos; no instruction, but not exactly difficult once you’ve decided to just get on with it.
If you really want to improve the instructions I would add lots of photos. And I would discuss the options or alternatives at each major stage so people can then do things their own way. I would probably also do it as a downloadable .PDF document (on your web site) so that you can modify it as and when you want. And then each new builder can download the latest version. (if you want to pinch pictures or descriptive text from this forum please feel free).
So pleased I’m now getting back into the building; it’s now starting to look quite impressive, and I’m enjoying it so much.
Terrified at the prospect of actually having to fly it one day though.
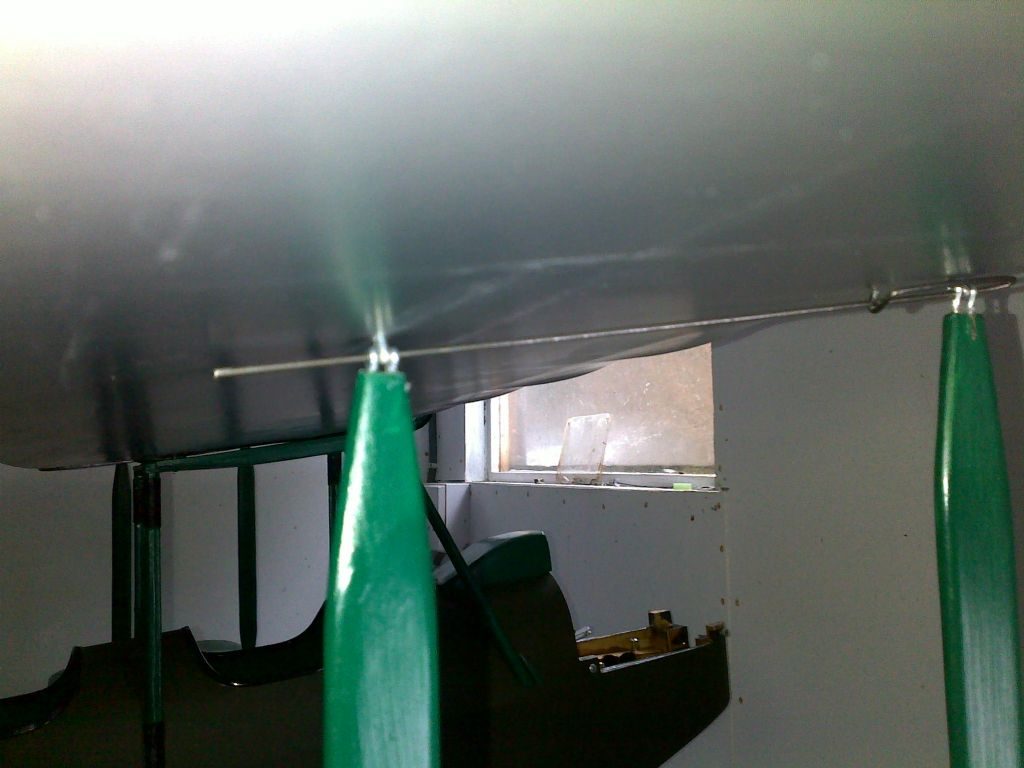
The bottom of the strut is simply a hooked piece of wire, that only comes out when you lie the strut down horizontally. (I think that’s what you people were trying to tell me earlier; – bleeding obvious now !).
And at the top, I’ve moved away from the instructions a bit, and used TWO split pins on the strut, one to go either side of the one in the top wing.
Photo’s not too good, but I think it shows what I’ve done.
Seems to work anyway.
Got a way to go yet, before doing anything as dractic as actually flying the thing.
I’ve fitted the servos, but got some work to do on connecting them up etc.
Got to fit the engine (can’t picture what I’m going to do with the exhaust yet).
might buy a flexible exhaust (for my Saito 72)
got to fit the pilot and fit out the cockpits (maybe that can wait a while).
got to buy a receiver (far too expensive Futaba one).
got to fit the flight battery
got to fit the refueling valve.
then the remote glow.
then the battery charging connector thing
then the power switch
check the CoG.
and then all the other things I haven’t thought of yet.
Gave up trying to fit a remote glow plug. Didn’t want to take the engine out ‘again’.
So I’ve just cut a hole in the cowl for the glow-start thing. It’s a bit of a compound angle, so I cut a small starter hole in the thin plastic, then opened it up slowly to get the angle right. I then rolled up a piece of masking tape, around the glow-start with the sticky side out (quite a few turns to give enough clearance). I then slid the glow-start out carefully, removed the cowl, turned it upside down and then poured some epoxy around the masking tape.
When it had set I removed the masking tape and it looks perfect.
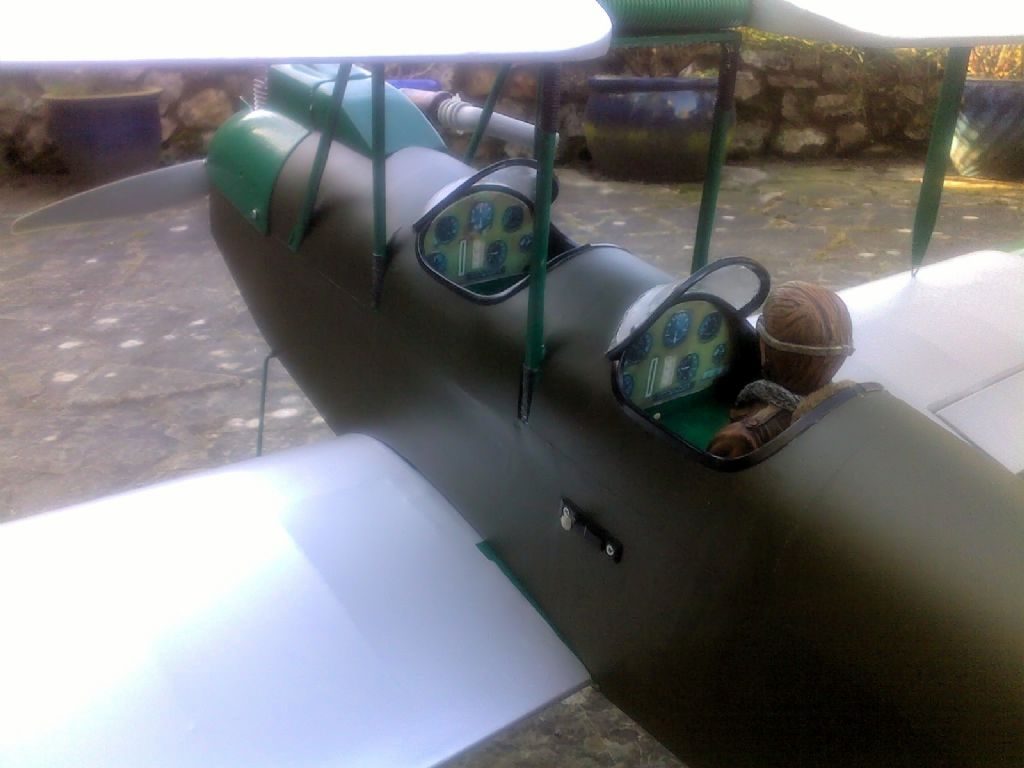
Next photo is of the screens being glued in.
I put some of the coaming around the top of the screens, but it’s not gone round the curve that well, and I’ve now got gluey fingerprints on the screens!
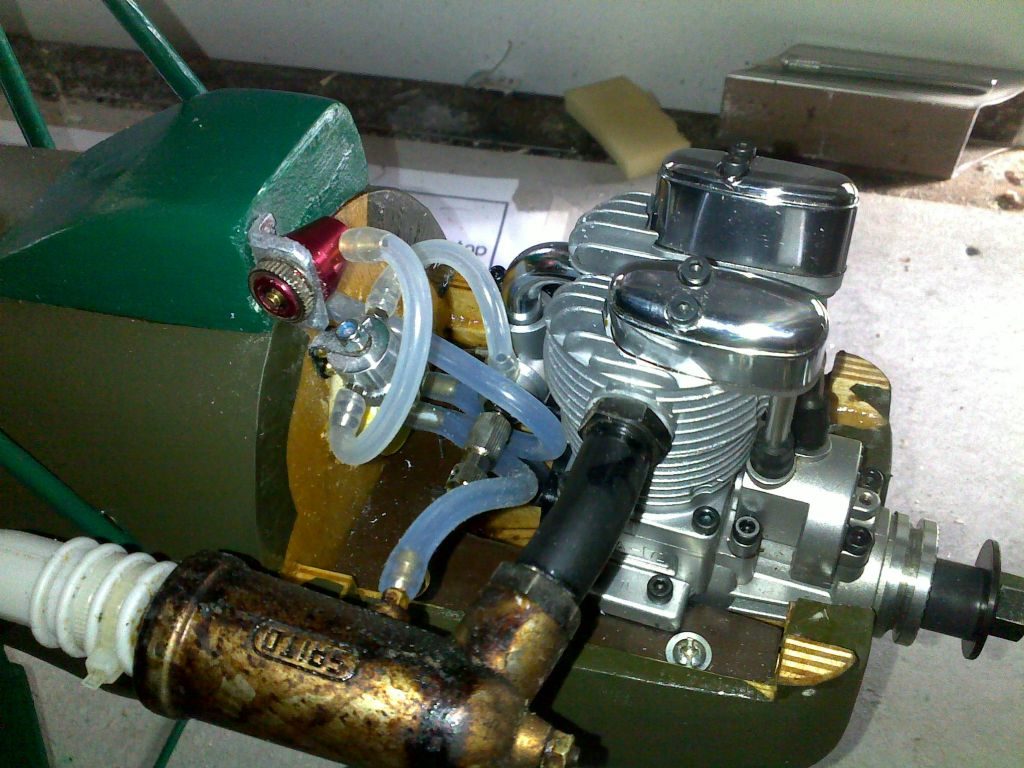
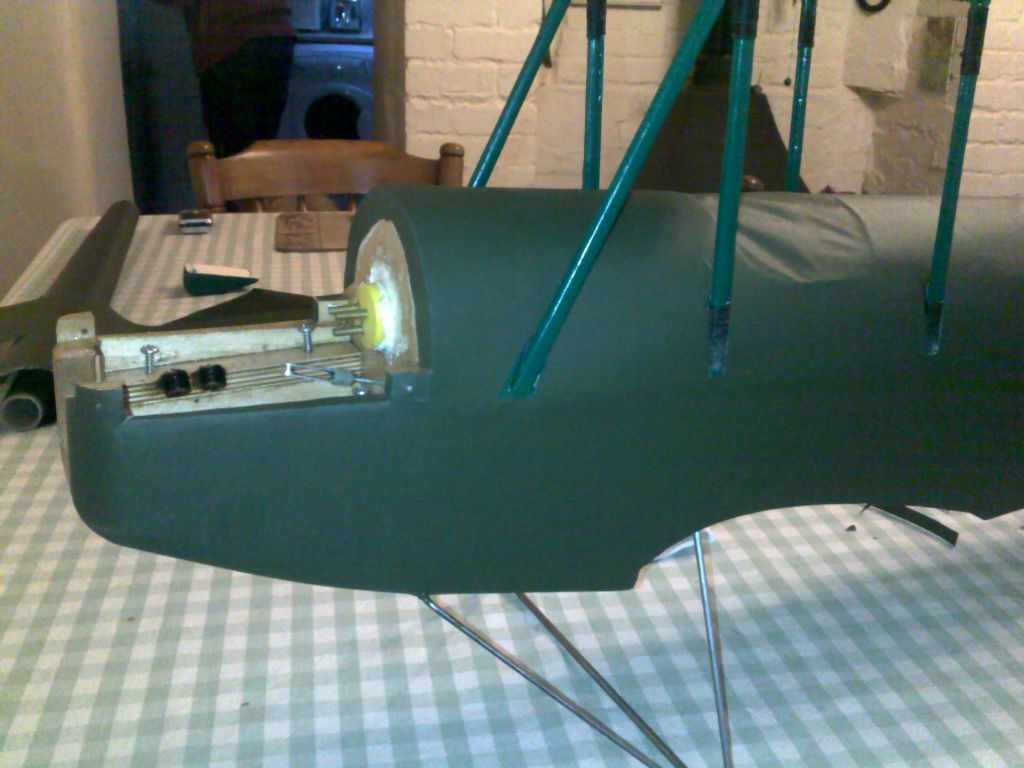
This photo is of the plumbing.
I used a three pipe fuel tank, but then decided I wanted to use a flller plug thing, so one of the tank pipes seems to be redundant, so I’ve just plugged it.
Fuel is now supposed to go from the tank to the bottom of the filler-plug (the red bit in the photo). Then on to the filter, then the carb.
Don’t like the exhaust at all; just looks wrong on an old bipe, but it’ll have to do for now, I’ve given up getting a Saito flexible exhaust, nobody seems to supply them.
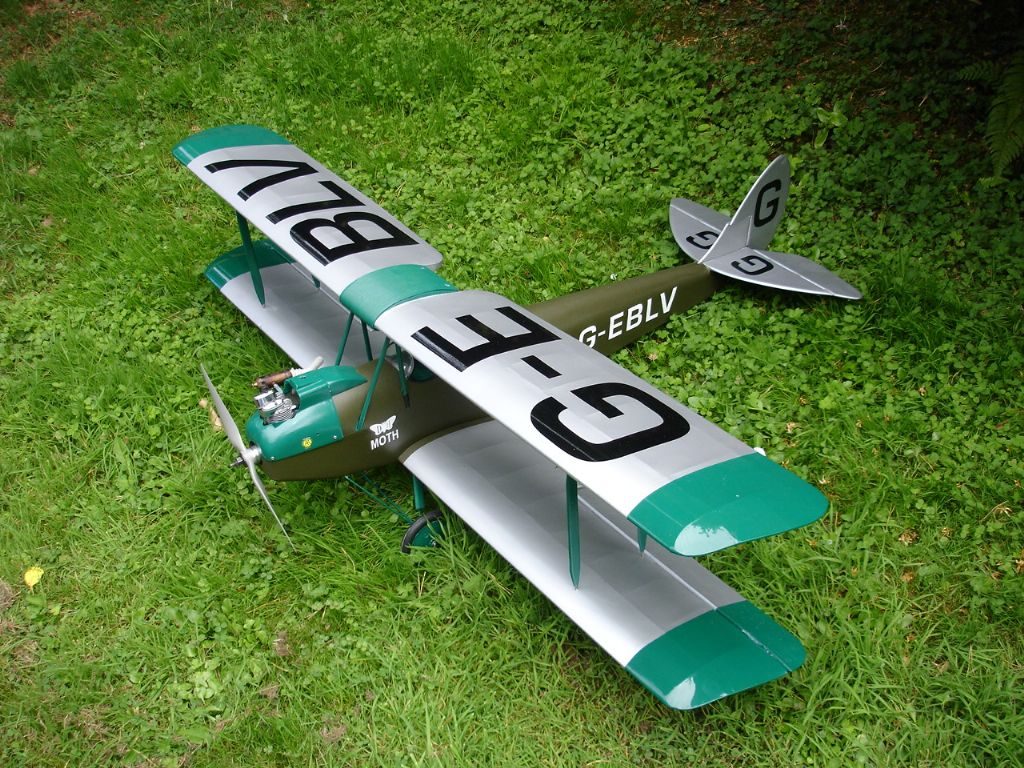
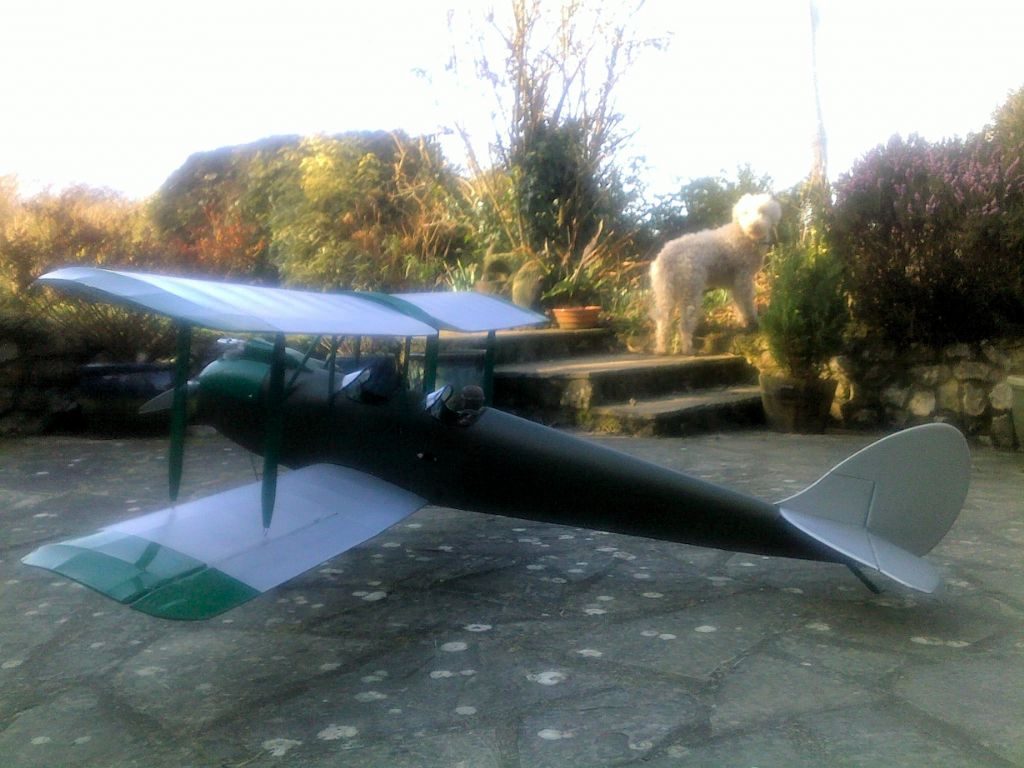
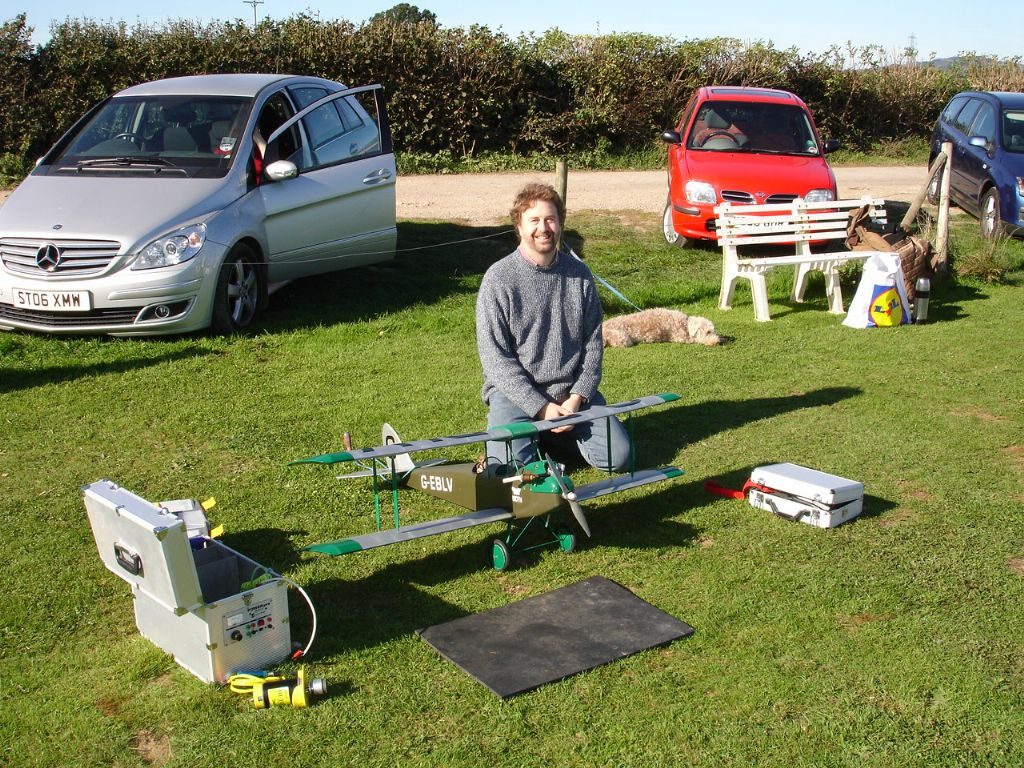
First full assembly done.
Looks great, think I’ll just sit and look at it for a while now.
Now fitted the pilot and fitted out the cockpits (not very good, but might do it again – better – one day).
Bought a receiver (far too expensive Futaba one).
Fitted the flight battery
Fitted the refueling valve.
Fitted a battery charging connector thing with a power switch
Checked the CoG, and it’s right on the main spar (must check in the instructions what it’s supposed to be).
Did some servo testing, and found that the right aileron doesn’t want to work at all.
Then I got it stuttering.
Then it wouldn’t work again.
This is a pain because I’ve araldited the (Multiplex Green) connector inside the wing, and araldited a special flying lead to go from the r/x (2 channels) to the other half of the Multiplex connector.
Bugger !
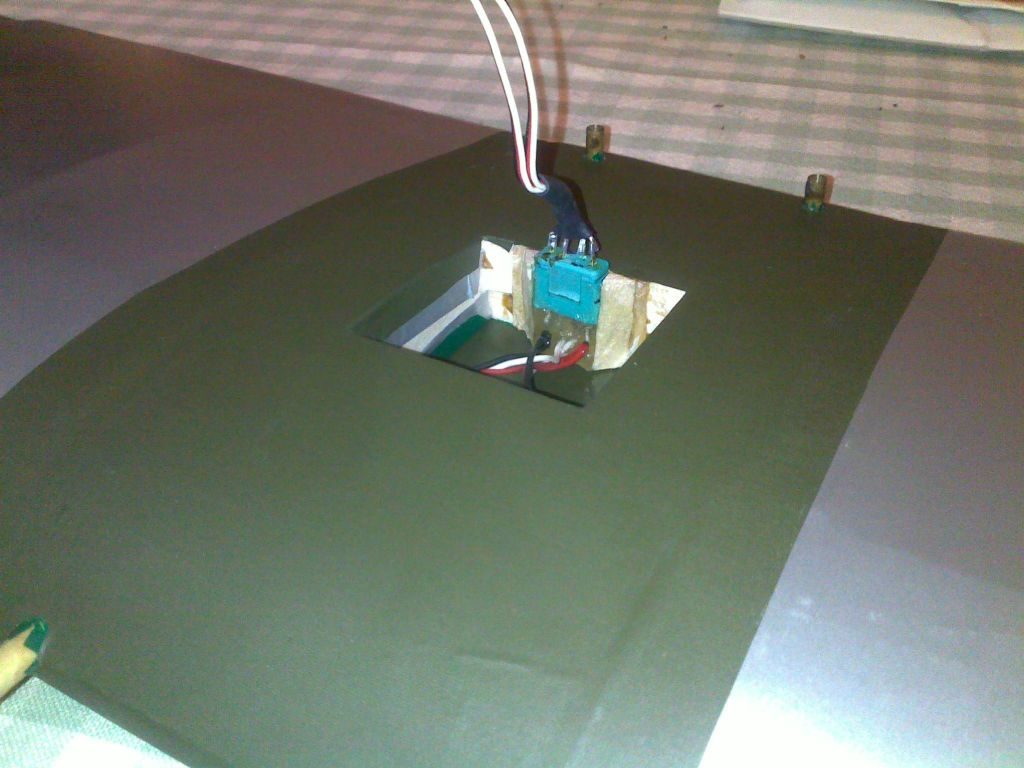
I’ve been having a right problem getting the aileron servos to work. One was working fine, the other only occasionally, then glitching, then buzzing horribly. I did some tests and assumed it was my central wiring connector, (I posted a photo on 20th July 2009 (page 11) ). So I dug it out, stripped it all and did it again, and the servo acted exactly the same. So I’ve just bought a new servo (the previous one was new but I can’t remember where I bought it) and it’s all perfect now.
This photo here shows the connector in the middle of the wing, bottom half epoxied in, top half connected to the receiver.
Now I can get on with the rest of it again.
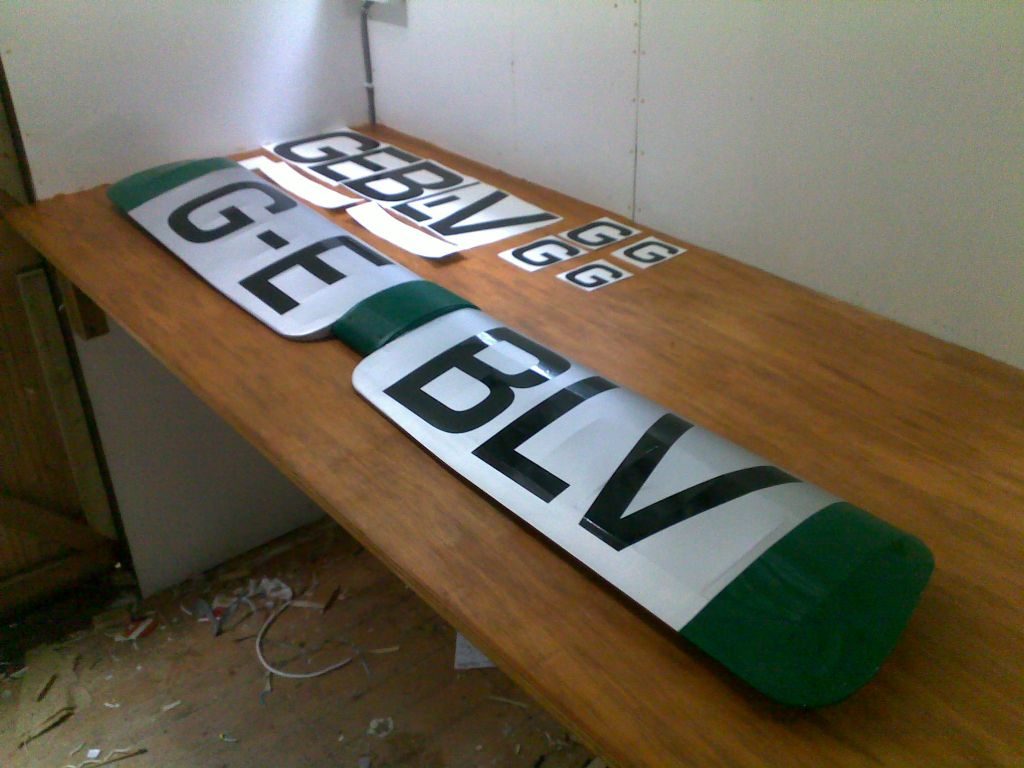
No clues at all about where it all goes.
There’s two sets of the large letters. One, obviously for the top of the top wing. Maybe the other goes on the bottom of the bottom wing?
There are four ‘G’s, two larger than the others.; maybe for the tailplane?
Sticks well though.
The CoG on the plan is 50mm back from the front of the mounting plate.
Mine balances, without any added weight at all, at 55mm. So, as that’s the same as Dave Edwards, it’ll be near enough for me.
I thought it might be tail heavy, because I did add a few extra braces to the rear fuselage (I kept breaking it whenever I picked it up, before it was covered), but then the Saito 72 is larger than recommended so I guess they counteract each other.
I’ve now weighed it and, empty, it’s coming out at 2.8kg (6.17 lb in old money).
TWO AND A HALF YEARS !!!!
Blimey….
Here’s some final pics, before I run out of excuses and have to finally fly the thing.
And now I’ve finally flown it.

.
First maiden was short; the engine died on rotation, so the flight was about 30 yards, dead straight.
The second maiden (can you have a ‘second’ maiden?) was much better.
Pulled skywards rather quickly, partly because the Saito 72 is rather over-powered, and partly because I wanted to get away from that scary ground stuff as soon as possible.
She wanted to pull quite strongly to the left; not on the ground, only in the air. Took a few right clicks on the aileron trim to steady her. Then a few down clicks to stop her climbing so eagerly.
Beautiful !!!
I did set one of the switches on the t/x to mix aileron to rudder,but I couldn’t remember which switch! So I had to fly her ‘properly’, and use both the aileron and the rudder sticks.
I did manage to get someone to film it, so hopefully I’ll get a video posted here soon. I did a couple of low, slow passes, and she flies very nicely; unfortunately the actual landing run wasn’t so smooth, but she came down fairly gently, and all in one piece.
I didn’t need the bin-bag after all.
I need to spent a lttle time now, sorting out the trims, trying to find out why the throttle-cut won’t work, etc, etc.
And then hopefully lots of time actually flying her.
Thank you so much Eddie et al, for your patience and opinions on this thread. I’ve loved building it, and can’t quite believe that I’ve really built something that can actually fly.
I’m already looking for the next kit, probably a big glider.