Cirrus Moth Build Diary by Martyn Johnston
(This is a build thread that originally appeared in modelflying.co.uk, the forum run by RCM&E. I have extracted Martyn’s contributions and selected a few replies.
If you want to see the whole thread click HERE
I have found it interesting not only because it is a good description of a first build, but also a lesson learned that you have to be careful what you criticise because you might find the manufacturer taking you to task! Unfortunately the review is not complete, any pictures of the finished article. Martyn?)
Flown my ARTF.
Passed my ‘A’ test.
Thought I should build a ‘proper’ model plane.
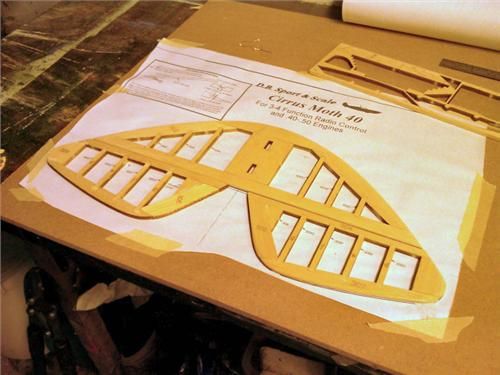
I’ve shopped around a bit, and gone and bought a Cirrus Moth from ‘DB Sport and Scale’.
I’m hoping that by the time I’ve built it; I’ll be good enough to fly it !
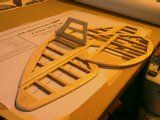
The kit looked surprisingly well made, good quality wood, very nicely laser cut.
Lots of bits in there, that I can’t imagine what they’re for yet.
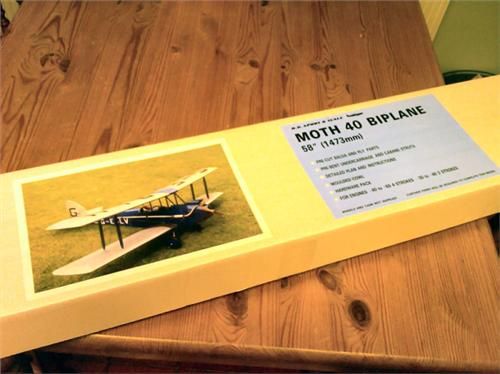
Can’t wait to get started.
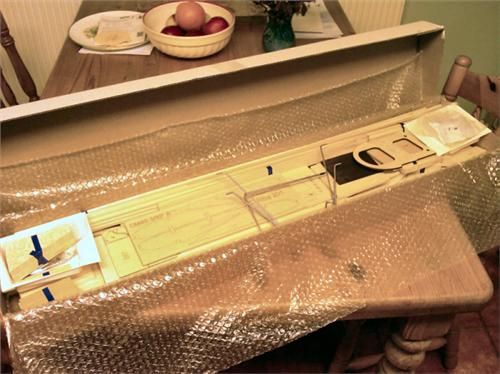
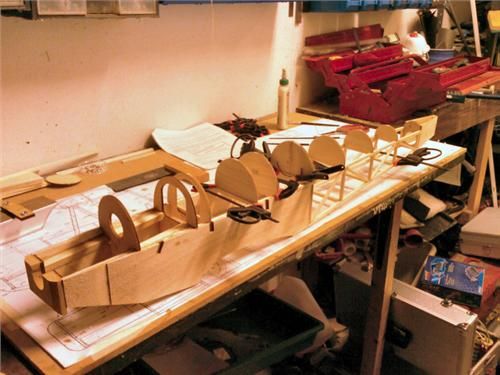
Started on the tail, because it looked easiest.
I know I don’t have much experience of modern day kits; but I must say that the quality of the wood and the fit of the bits is far better than I expected.
Tail bits went together quickly,
Fin and rudder tonight.
Haven’t given much thought yet to covering materials,
Don’t want it too shiny, but must be easy to fit, and tough!
– or even engine.
thinking of a Saito 62(ish) – don’t know what the biggest 4-stroke is that it will take.
I don’t want it to fly fast – I just prefer a big engine ticking over to a small engine screaming its nuts off.
Any suggestions anybody?
What are rib-tapes?
I said earlier that the quality of the wood was better than I expected. I now have to qualify that and say that the balsa is super, but the plywood bits are a bit cheap and nasty. Several of them are completely delaminated. Might have to rebuild a few (using the supplied ones as a pattern). But I’ll try thin CA and clamping them tight first and see what happens.
Rib tapes cover the stitching that fixes the fabric to the wing ribs. On the full size, they are around 100mm wide, and are doped on. For your model, they can be made from solartex, which tears nicely to give a frayed edge. They really do enhance the quality of the wing…A real anorac, would simulate the stitching below, so that there are little bumps showing through….Mon dieu, sometimes, I think we are all daft..
I’ll try to dig out a photo…..ernie
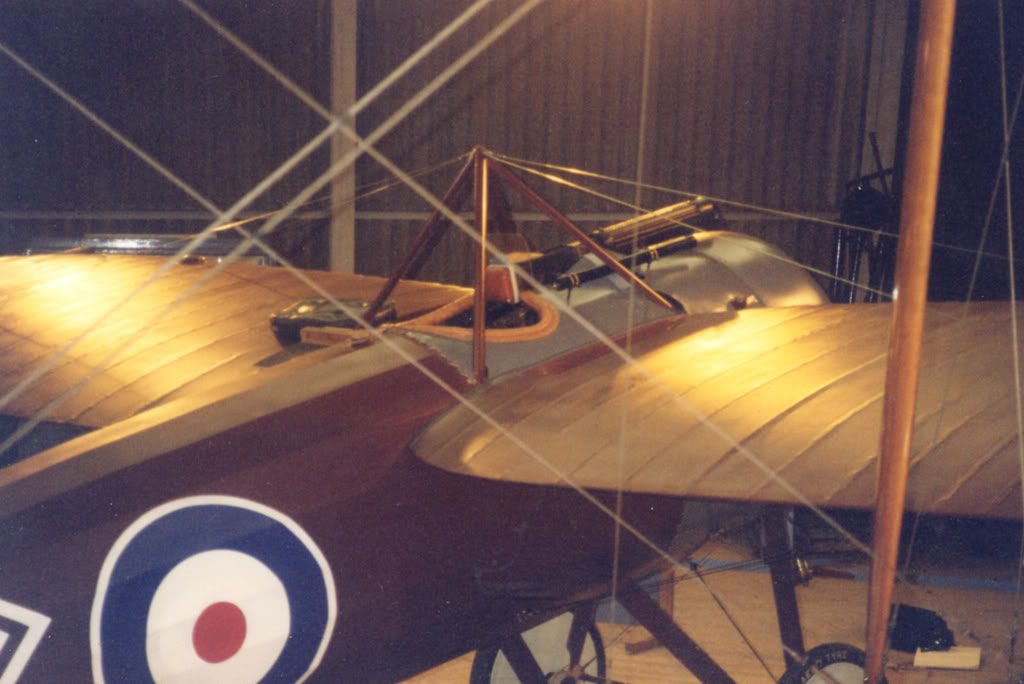
Hi Martyn This is the bristol fighter at the Shuttleworth collection. You can see rib tapes over each rib. These ones seem to be about 50mm wide
ernie
Note to all new builders:
Soaking delaminated ply in thin CA, and then clamping it in a vice might seem a good idea, but it doesn’t seem so clever when you try to open the vice later, and find it all stuck solid !!
Built the tail pieces now. Looks very clean.
Noticed that the real moths had the surfaces fairly sharply tapered at back and front.
Some model builders seem to leave them quick thick and blunt.
Any recommendations?
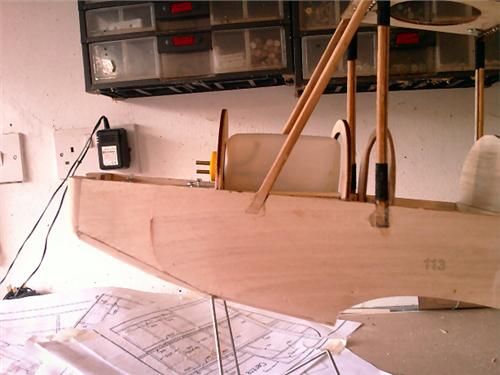
Now putting the fuselage together
More involved than the tail (obviously) and this highlights that the instructions aren’t overly detailed !
A good guide as to what to do, but you are assumed to be quite competant.
(which makes it fun).
I took a full-size copy of the plan before I started and am using that. I’m finding it easier to cut it up and use just part of the plan at a time.
I also took a mirror-image of the plan, ‘cos it seemed easier to build the second-half of the fuselage that way.
Hello Martyn,Just having a scoot around the web and came across this forum on RCM&E and your build comments regarding the Moth.We are a little taken by surprise and in fact dissappointed to read your comments regarding the ply parts.If you had a problem with any part of the kit, surely we should have been contacted first to have the opertunity to correct it rather than publishing it on a forum to discredit our name.We always try to look after our customers in any way we can, if there are faulty parts in any of our kits, we will replace them.Judy & I work very hard to produce quality aircraft kits, we have and are still working hard in resurrecting this business from near collapse.Your forum comments are quite derogatory and wholly unnecessary regarding cheap ply. We have spent many long hours in sourcing a ply type that will laser cut cleanly, this ply is also more expensive than most comparative plys.You will notice that the ply parts come cut in layout sections, any plywood (no matter what quality) can have a glue fault in it. when this kind of thing occurs, it is much better to talk to the manufacturer in preference to negative comments on a forum.
Kind Regards
Eddie & Judy Stocker
Eddie,
Sorry to you seem to be so upset.
You said that my ‘comments are quite derogatory and wholly unnecessary regarding cheap ply’. I think if you read my comments again you’ll find I never mentioned cheap ply at all. And I can’t see what I said that was derogatory.
I think it’s fair to say that, on the whole, I am THOROUGHLY DELIGHTED with the kit so far. I’ve said on this forum what high standard the parts are. I think the kit itself is VERY HIGH QUALITY, and incredibly GOOD VALUE FOR MONEY.
This is a discussion thread, not a ‘positive opinions only’ thread. People want to hear honest opinions, and how we overcome the inevitable obstacles. I stated that I did get a couple of delaminated ply peices. I fixed it easily, and said what I had to do.
Martyn
I’ve read my comments again…and yes I did say that.
To be factual, two peices of ply were badly delaminated, and a couple of others just a little bit. I never thought this was a major problem, it happens with any materials, especially wood. Any model builder should know and accept that. It wasn’t difficult to fix (although my first attempt CA’d the wood to my vice ! – second attempt I wrapped it in plastic tape (sticky side out) before putting it in the vice and it came out perfect).
Shame Eddie’s got a little heated over this. I think my positive comments on the kit throughout this thread, and discussions up the field, have FAR outweighed this small negative one, and I would still recommend DB Sport & Scale to anyone as a quality builder of scale kits. This was a factual statement, not a derogatory remark, and I think this is expected by readers of forums such as this.
Personally I always prefer an honest review to a sychophantic advertising piece.
I dont think DB Sport & Scale were at fault ! I just received a couple of “less than perfect” bits of wood !
I didn’t phone and ask for a replacement because it wasn’t a big problem, it just needed a bit of glue. When I tried to fix it I glued my vice shut. I though that was comical enough to post about it. I’d have learned not to do it that way if I’d read about somebody else doing it.
I’ve emailed Eddie on other matters (me misunderstanding the instructions and advice on engines etc) and he’s been fine and helpful.
I’ll phone you soon Eddie, and this’ll all be forgotten…..
Undercarriage next !
For the record, DB is probably one of the most approachable UK KIT companies period.
Many Thanks for your help eddie with my 1/4 scale pup queries that you so kindly helped me on even though I bought the kit secondhand.
Faulty products are not the problem, but how they are resolved that matters.
Now enough of this sillyness, breaks over, back to building!!!!!
Back to the build, anybody that’s still interested after all the interuptions.
It seems that the ModelFlying.co.uk techies have fixed the photo gallery thing, cos I’ve managed to upload another picture.
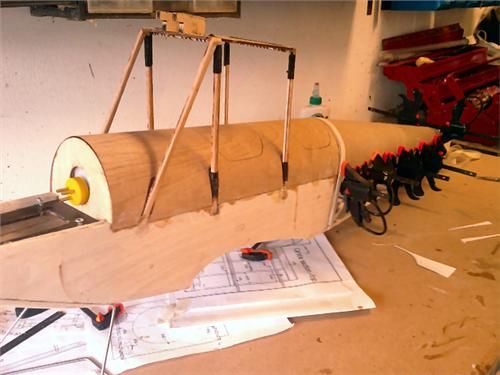
The fuselage is coming along great; decision time now, because I have to put the tank in before I glue the top thin ply (which looks a very nice peice of ply Eddie!) on the top of the fuselage. So do I glue the tank in? If not it’ll rattle around like a prick in a bucket. I think I might as well, because once I’ve glued the ply fuselage top on I’ll never see the tank again anyway.
Still not sure what engine I’m putting in, so not sure if tank position is going to be important.
Decisions, decisions…
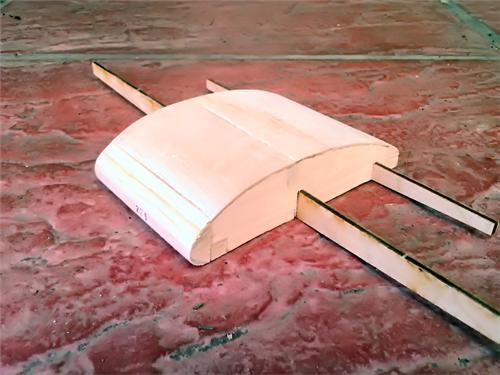
Top wing center section is also coming along well.
Thicker than the wing, as this was, I think, the fuel tank on the original.
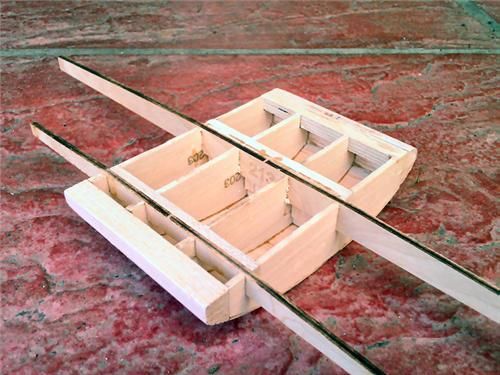
Instructions say to leave the front open (‘cos thats were the attachment to the cabane structure is) but I’m not yet sure what I’m supposed to do with the rear half. To be decided later I think.
Earlier post shows the cabane platform thing with lots of thread dangling down.
This was my attempt at attaching the ply platform to the wire ‘U’ shaped support struts, which I’ve also bound to the wooden ‘legs’.
I drilled lots of holes in the platform, about 4mm apart. I then threaded some very, very strong thread (got it from the local cobblers). I left it very loose and dangly. Then I applied lots of thick Araldite, and then pulled the thread very tight. (very, very messy job).
Don’t know if this is how you’re supposed to do it, but I tried it and it seems to work.
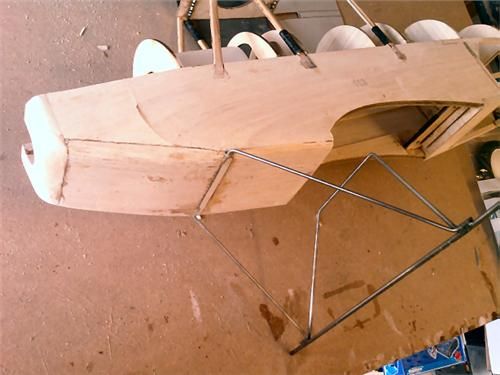
These pictures show the wire undercarriage attached to the fuselage. Difficult and fiddly, but seems to work quite well. Thin peice of balsa araldited over the join has allowed me to sand it down smooth.